Creating macros on your Mac is incredibly easy with Keyboard Maestro and we show you the basics right here.
Keyboard Maestro is a super-charged $36 macro creation application that, if you ever try it, could (and probably should) be an essential part of your daily work routine.
An Introduction to Keyboard Maestro
Keyboard Maestro is so powerful that we’re going to spend a few days here looking at the application’s features, play with some of the productivity tools baked in to the app, create some macros of our own, create new keyboard shortcuts to trigger those macros, create palettes to trigger macros with the click of a button, and gain a solid understanding of just how powerful creating a few macros can be in helping you simplify repetitive tasks.
Following is a short list of just a few of the things you can do with Keyboard Maestro:
- Launch Applications
- Switch applications
- Switch windows
- Run AppleScripts
- Copy, move, rename, trash, and delete files
- Manipulate windows
- Create application and macro palettes
- Add boilerplate text to email and other documents
- Send SMS or iMessages
- Control iTunes
This list is by no means complete, No joke, there’s almost nothing you can’t do with Keyboard Maestro, so let’s go!!
What You Need To Get Started
The current version of Keyboard Maestro requires that you’re running Yosemite (10.10) or later on your Mac. Here’s how you can check to see if Keyboard Maestro will work on your Mac:
- Click the Apple Menu
- Select About This Mac
- Verify that you Mac says Yosemite with a version number of at least 10.10 or later just below your operating system name

If it does, download Keyboard Maestro using this link.
If it doesn’t, not to worry, you may still be able to perform most of what we talk about here using an older version of Keyboard Maestro, which you can download here.
Install Keyboard Maestro
After Keyboard Maestro downloads, drag the application from your Downloads folder to your Mac’s Applications folder.
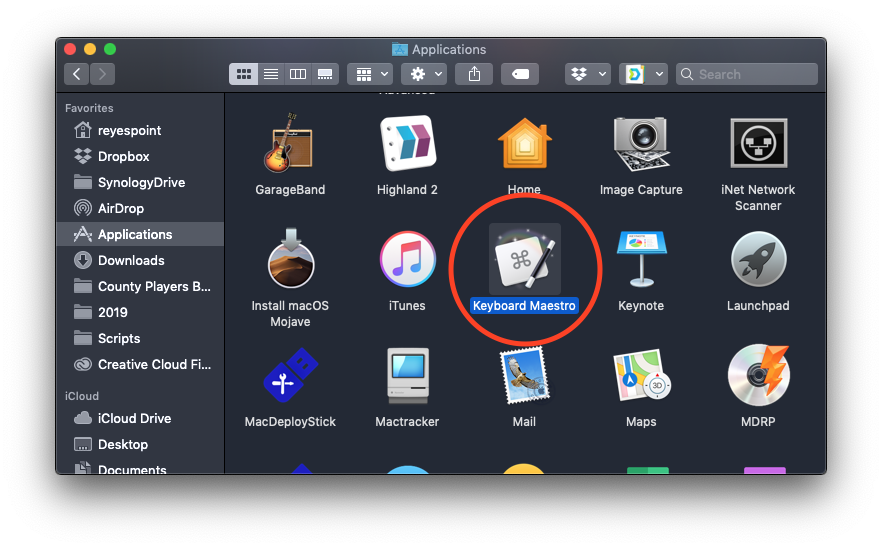
Once there, give it a double-click to open it.
Change Your System Settings
Because Keyboard Maestro performs some of its magic by monitoring your keyboard input you’re going to need to allow the application to have access to your keyboard input information. The first time you launch Keyboard Maestro you’ll see a message saying that it requires Accessibility Access.
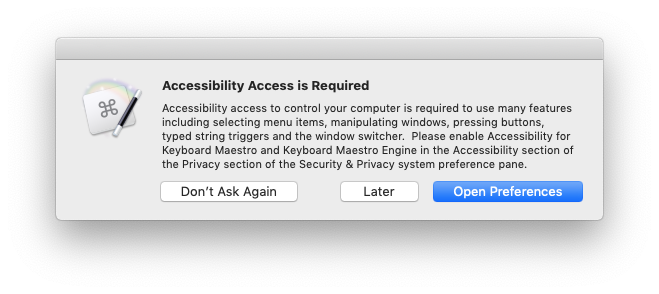
When you see this, click the button that says, Open Preferences.
When System Preferences opens you should see something like this:
NOTE: If this isn’t what System Preferences looks like for you, you can:
- Open System Preferences.
- Open the Security & Privacy preference.
- Click the Privacy tab.
That will get you where you need to be for the next step.
To allow Keyboard Maestro the appropriate access:
- Click the lock in the lower-left corner of System Preferences.
- Authenticate as an administrator.
- Put checks in the boxes for Keyboard Maestro and Keyboard Maestro Engine.
- Close System Preferences.
Let’s Take a Quick Look Around
We’ll go into more detail in the next few articles, but let’s take a quick look around.
There are four things you should see when Keyboard Maestro first opens:
- Keyboard Maestro Welcome Window
- Keyboard Maestro Editor
- Keyboard Maestro Application Palette
- Keyboard Maestro Menu Item
The Keyboard Maestro Welcome Window is designed to give you a quick introduction to Keyboard Maestro. Using this you can view the Keyboard Maestro tutorial, view the Keyboard Maestro Quick Start Website, and get assistance and access to frequently asked questions.

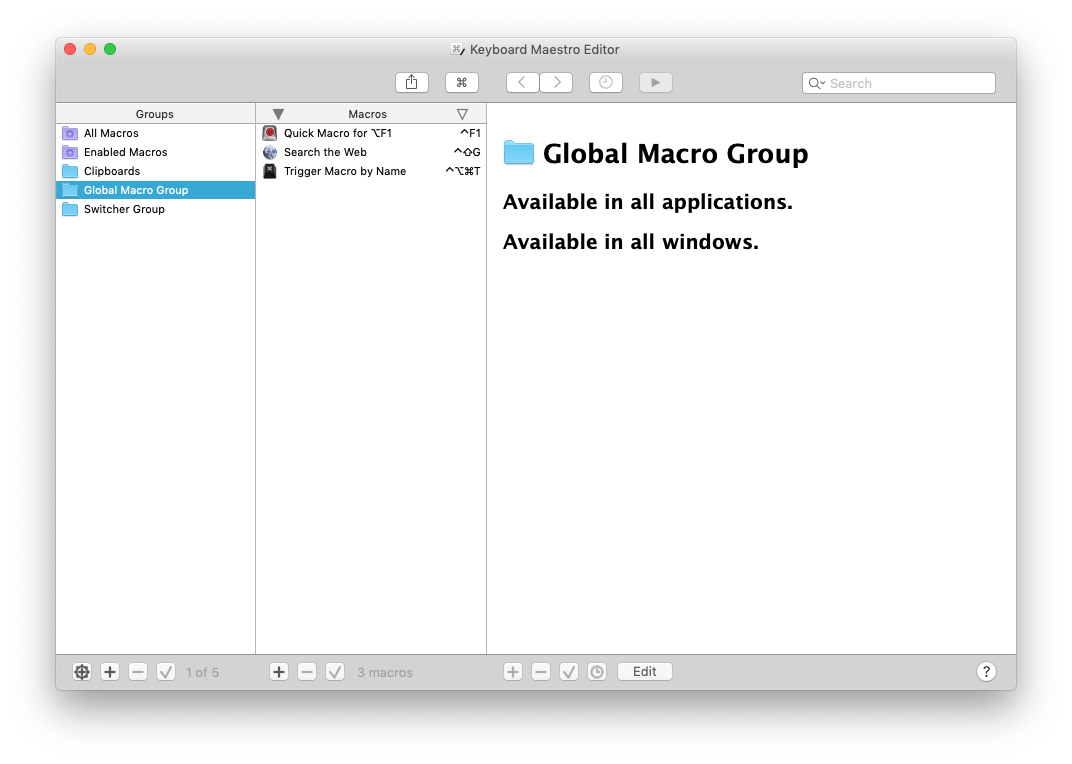
You use the Keyboard Maestro Editor to create, manage, and edit Keyboard Maestro macros and palettes.
The Keyboard Maestro Application Palette displays a list of all the applications you currently have open and lets you switch between those applications with a click of a button.
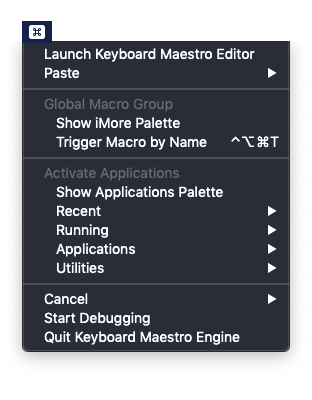
Keyboard Maestro’s Menu Item gives you quick access to saved macros and palettes and many of Keyboard Maestro’s other features.
NEXT: We’ll look at customizing Keyboard Maestro’s built-in features.
How to get started with Keyboard Maestro on Mac syndicated from https://bestpricesmartphoneweb.wordpress.com


 Since Motorola launched the Moto G7 smartphone series in the US some months back, all G7 models have seen price cuts at some point or another. Now, the unlocked Moto G7, Moto G7 Power, and Moto G7 Play are once again discounted, although not directly by Motorola. To get tempting discounts on these three phones, you currently have to purchase them from Best Buy.